Recording and Decrypting SSL Encrypted Traffic

There comes a time in every engineer's life where it becomes necessary to decrypt SSL/TLS encrypted traffic. Whether it's debugging, security analysis, or just to have plaintext records of traffic, SSL can just get in the way.
I recently needed to make a packet capture (pcap) of decrypted SSL traffic. Most tools just generate text files and logs of the decrypted SSL traffic but it's significantly easier to work with pcaps because they already have a wealth of existing tooling.
Unfortunately it's not possible (as far as I can tell) to generate a pcap, decrypt the traffic, and save the decrypted version as a single pcap. However, we can approximate it very closely by saving the encrypted pcap with SSL session keys alongside it.
I should make a note here that this of course will only work on clients that you control enough to install a new certificate authority.
There's no secret SSL decrypting magic wand here.
Recording Environment
When you're recording pcaps for analysis or teaching it's good to get a clean capture. You don't want your students or coworkers to see your Reddit history in the networking traffic after all.
Hardware Used:
- Raspberry Pi with Ethernet and Wifi
- A MicroSD card preferably 16 GB or greater
- Ethernet Cable (and a place to plug it into for internet)
- Micro USB charger and cable or other power supply
- ALFA USB wifi adapter or other USB wireless adapter. I used an
Alfa AWUS051NHbut it doesn't really matter as we're only using this to isolate the target device's internet connection.
A Simple Router
Raspberry Pi's are the greatest little computers ever! In this case they will act as our recording device since we can route all of a computer's traffic through it and then record on the Pi.
-
Setup Raspbian Stretch Lite according to the instructions here
-
Enable SSH by putting a file named
sshonto the MicroSD card as discussed here -
Plug in the Raspberry Pi to ethernet and power
-
SSH into the Raspberry Pi. Default username is
piand the default password israspberry
At this point we have a basic Raspberry Pi setup. I choose to leave things (username, password, etc.) default since my Raspberry Pi's change uses often but if you are going to leave this somewhere, you might want to consider changing the password and other security related things.
- Now we want to convert the Pi into a router. This simplifies the process of connecting different devices. I've played around with a couple of different ways to do this but the definite best way is to setup RaspAP with the following one liner (copied from their Github) and following its instructions:
wget -q https://git.io/voEUQ -O /tmp/raspap && bash /tmp/raspap
Once the Pi reboots we are going to setup the SSL decryption aspect of this endeavor.
SSL Decryption
-
Run the following commands on the Pi to generate a certificate that you can use for SSL decryption.
-
openssl genrsa -out ca.key 4096 -
openssl req -new -x509 -key ca.key -out ca.crt
It will be useful to transfer the
ca.keyandca.crtfiles to your computer for later.
From here we are going to setup a tool called sslsplit which can intercept & retransmit SSL connections for us.
sslsplit will terminate SSL connections at the router, clone them to their original destination and then proxy the data back to the original connection. Provided that the ca.crt file that we just generated is installed on the connecting client, the client won't have any kinds of "insecure connection" errors.
Unfortunately the version of sslsplit inside of the Raspbian apt repositories is out of date and we need an option from a more recent version. Thus we will need to build it.
-
Download and build the
sslsplitsource code -
sudo apt-get update -
sudo apt-get install libssl-dev libevent-dev -
git clone https://github.com/droe/sslsplit.git -
cd sslsplit -
make -
make install -
Verify that you have the
-Moption inside ofsslsplit -h -
Create a simple sslscript wrapper.
#!/bin/bash
iptables -t nat -A PREROUTING -p tcp --dport 80 -j REDIRECT --to-ports 8080
iptables -t nat -A PREROUTING -p tcp --dport 443 -j REDIRECT --to-ports 8443
iptables -t nat -A PREROUTING -p tcp --dport 587 -j REDIRECT --to-ports 8443
iptables -t nat -A PREROUTING -p tcp --dport 465 -j REDIRECT --to-ports 8443
iptables -t nat -A PREROUTING -p tcp --dport 993 -j REDIRECT --to-ports 8443
iptables -t nat -A PREROUTING -p tcp --dport 5222 -j REDIRECT --to-ports 8080

mkdir /tmp/sslsplit/
mkdir logdir

sslsplit \
  -D \
  -l connections.log \
  -j /tmp/sslsplit/ \
  -M ssl_key_logfile \
  -S logdir/ \
  -k ca.key \
  -c ca.crt \
   ssl 0.0.0.0 8443 \
   tcp 0.0.0.0 8080
This script will route traffic heading to a specific port over to sslsplit listening on port 8443 or port 8080.
Note: You shouldn't really intercept traffic that should be plaintext (e.g. HTTP, FTP, TELNET.) Since they're in plaintext they can be easily recorded without a proxy in between.
Setting up the Client
If you want your pcap to be completely isolated and clean from contamination from your traffic. You should setup a virtual machine using VMWare Player or Virtualbox. From there you can plug in a USB Wifi Adapter into the virtual machine to give it Wi-Fi capabilities.
By using a VM and a separate wireless adapter, you can use your host computer to do research or other tasks and then specifically use the VM to generate traffic. This is of course entirely optional and you can just use your computer normally to connect but I prefer to use a virtual machine.
Within the virtual machine or other computer, we need to properly configure the client to trust the certificate authority that we generated earlier.
This step is critical because if it isn't done you will get consistent "Insecure Connection" errors. This will make your PCAPs pretty useless.
This process differs between clients. For one client you might just need to open a dialog and import the certificate, for another you might need to drop the ca.crt file in a special folder or patch it into a binary.
For simplicity's sake we will look at how this is done in Firefox.
I use Chrome generally but Firefox has its own SSL stack whereas Chrome uses the system's. By using Firefox, I can avoid installing the fake certificate in my system globally.
-
Transfer the
ca.keyandca.crtfiles from the Raspberry Pi to the client device. -
Download and install Mozilla Firefox
-
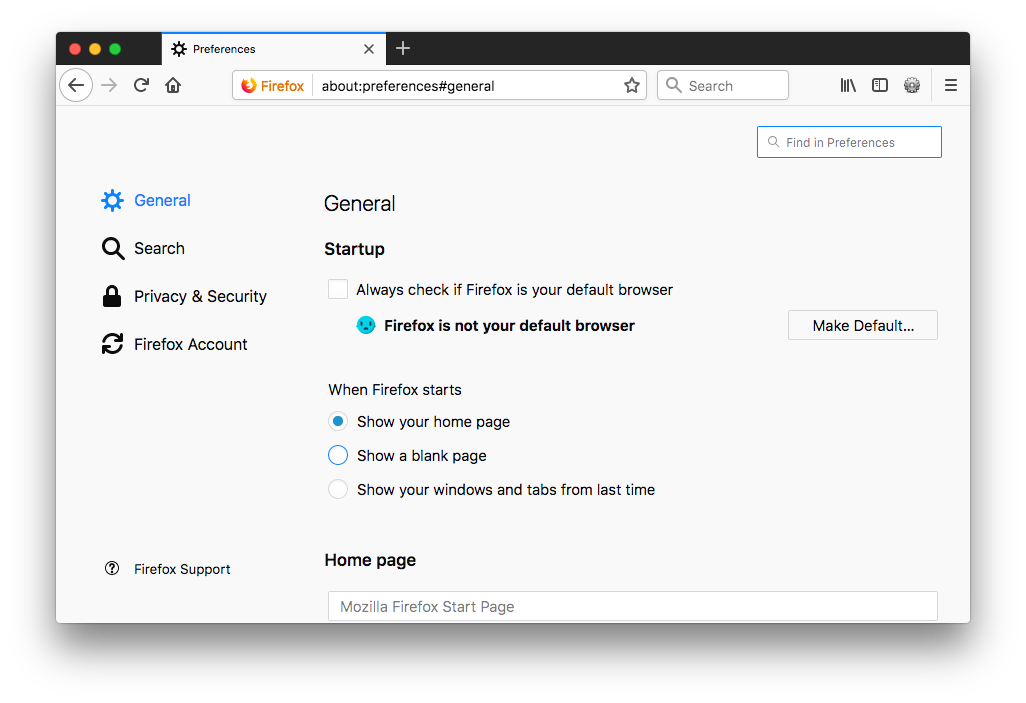
Open Firefox and go to Preferences. It's location depends on the OS but you can expect it to be under
Edit > PreferencesorFirefox > Preferences.
- From the
Preferenceswindow, search for "certificates".
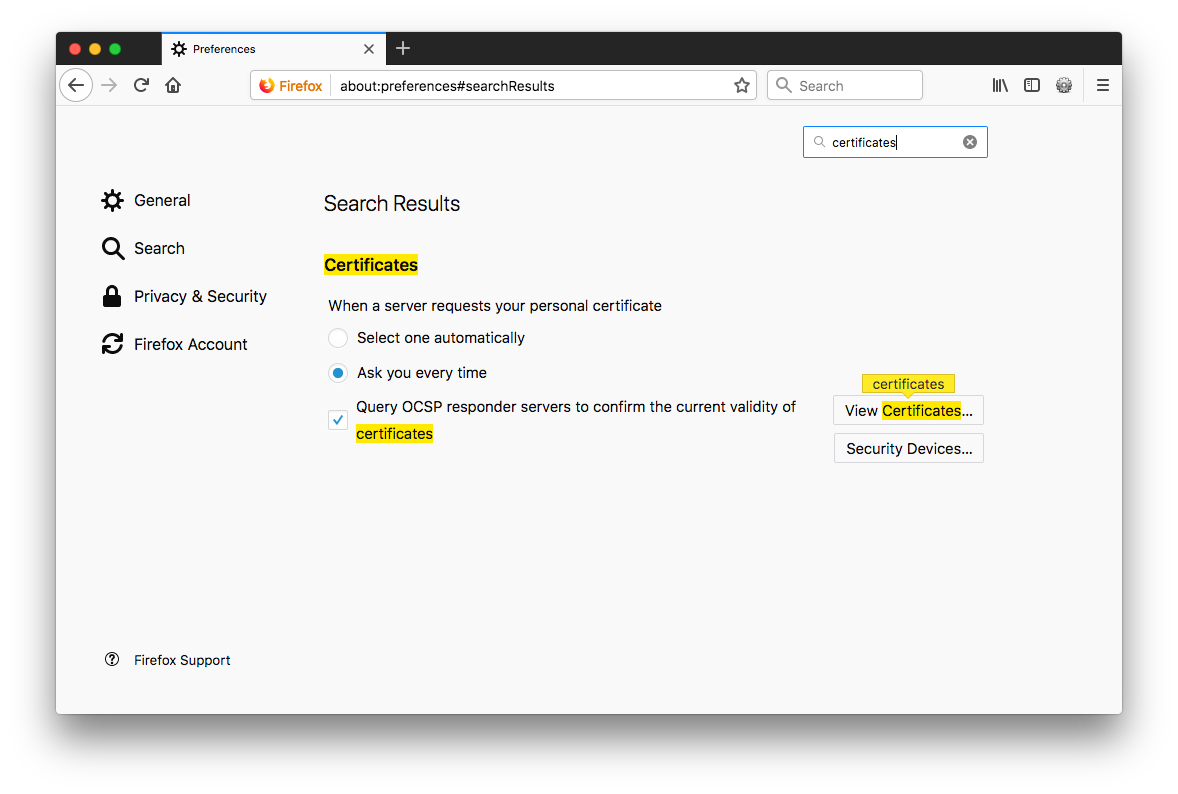
- Hit
View Certificatesand theAuthoritiestab
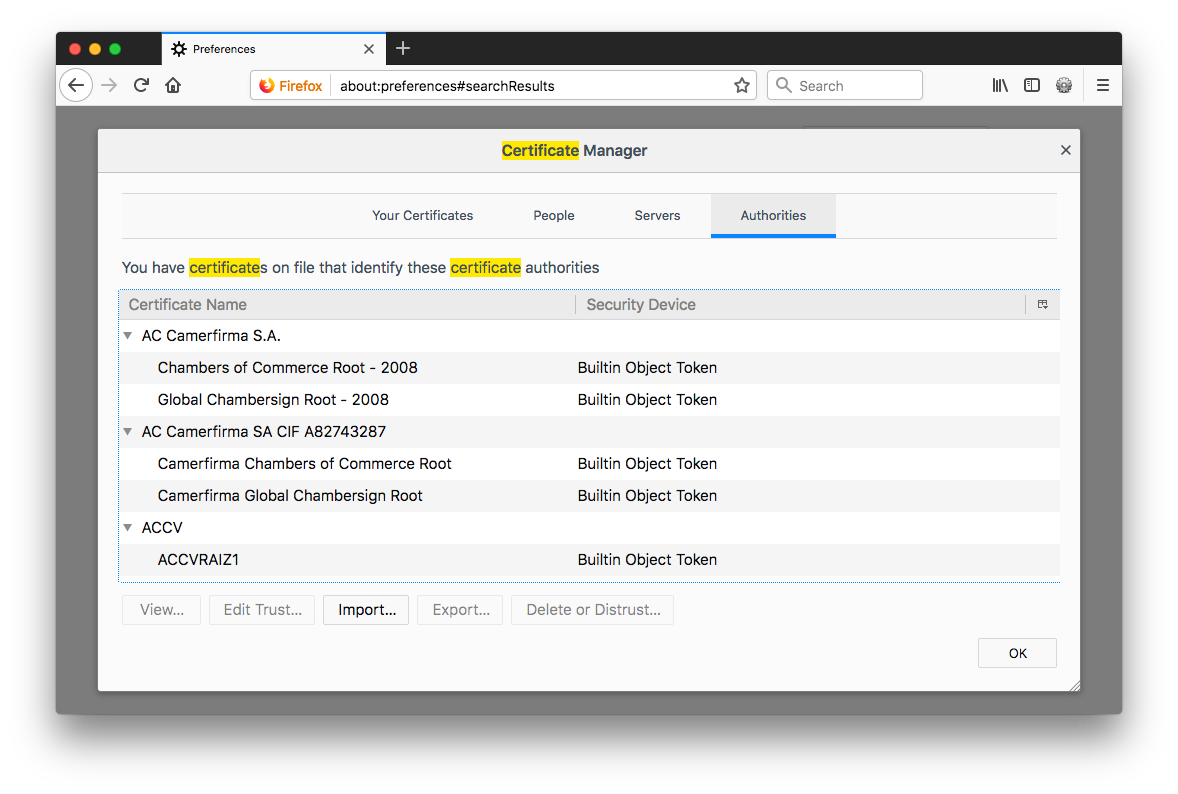
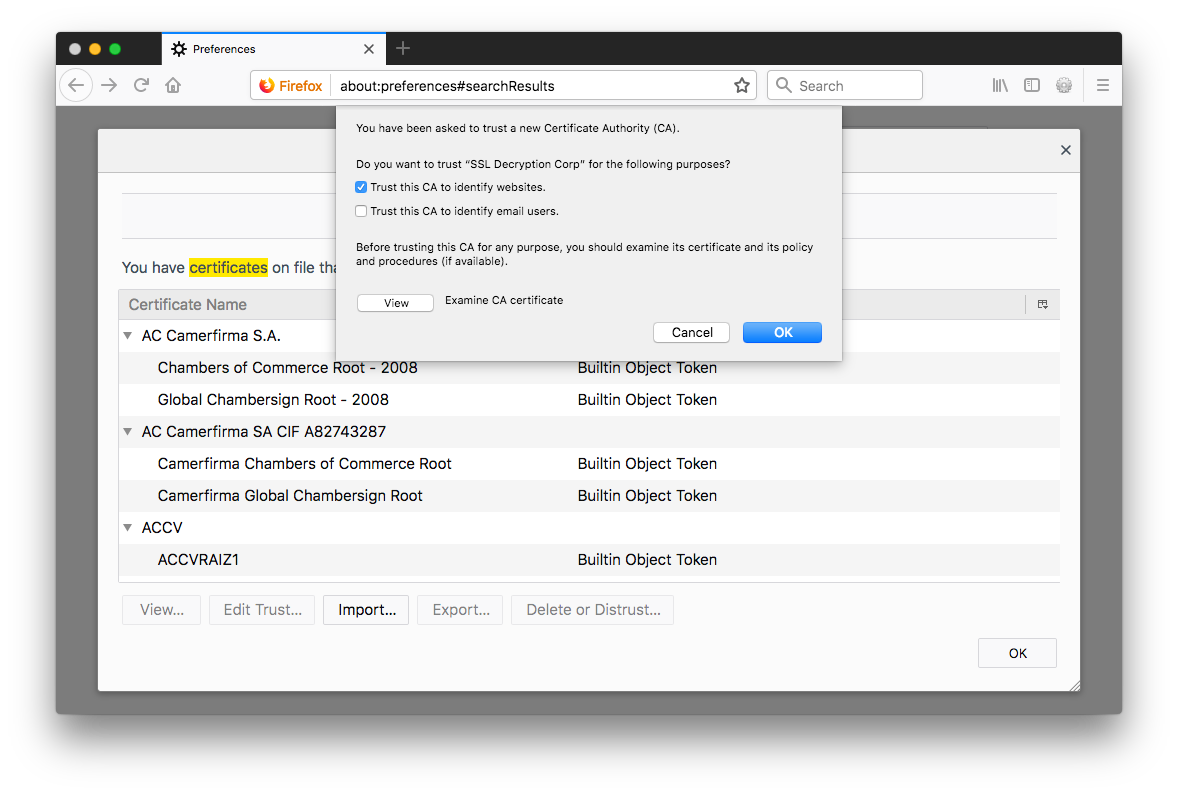
- Hit
Importand then choose theca.crtfile that was generated earlier. When asked, you only need to check on "Trust this CA to identify websites."
Hitting Record
Now that the client and router are all set, we should be able to connect and record the client's traffic.
As I mentioned earlier, the recording that we get won't be entirely decrypted. The connections are still SSL encrypted but we will have the keys needed to decrypt and have a pcap that we can work with.
- Plug in the Raspberry Pi created earlier and connect to the wireless network it creates using your device or virtual machine.
The default SSID should be raspi-webgui and the default password should be ChangeMe. You can find more details about the network on RaspAP's github page.
- On the Pi, run the
sslsplitbash script we created earlier intmuxorscreen.
I prefer to use the
tmux/screenwrapperbyobuwhich can be installed withsudo apt-get install byobu
- Start tcpdump to record a pcap by running:
sudo tcpdump -i wlan0 -w capture.pcap
- Using your device verify that you can initiate HTTPS connections that aren't considered insecure.
Also verify that sslsplit lists the SSL certificates of your connections and is also storing the raw decrypted traffic in the logdir folder.
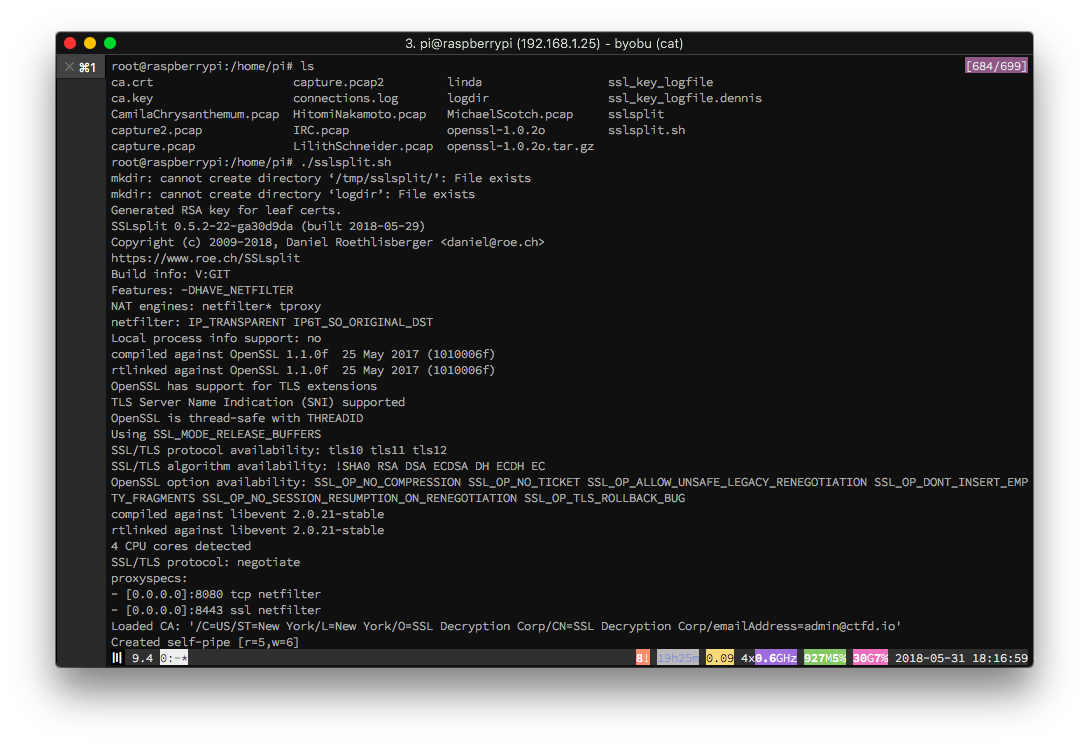
You should also verify that an ssl_key_logfile is being generated which should be filled with entries that look like this:
CLIENT_RANDOM 128BFD53FB54B81FED7F9C7AFF25F25DB128015FEE7E5C22D2DFC3B22F9A069B
- Do whatever traffic you wish to record and then stop tcpdump and copy
capture.pcapor whatever the filename is to your computer.
Analyzing and Sharing the Packet Capture
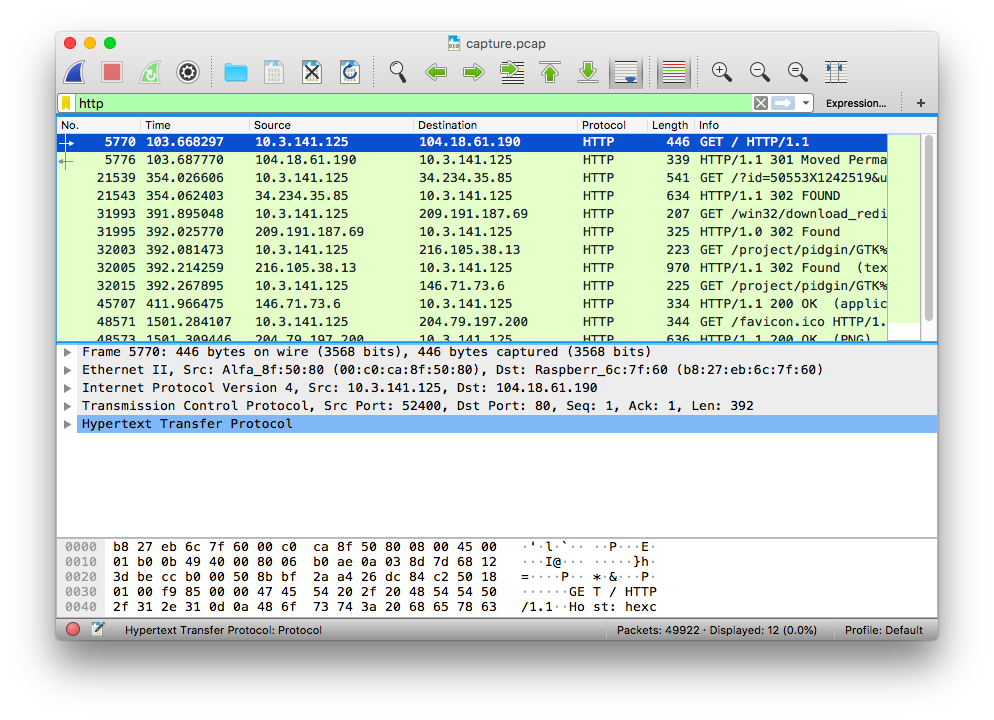
As is traditional, it's easiest to use Wireshark to analyze a pcap.
However of course, this traffic will be encrypted by SSL & TLS meaning most of it will be entirely useless.
- Open Wireshark and go to
Preferences > Protocols > SSL.
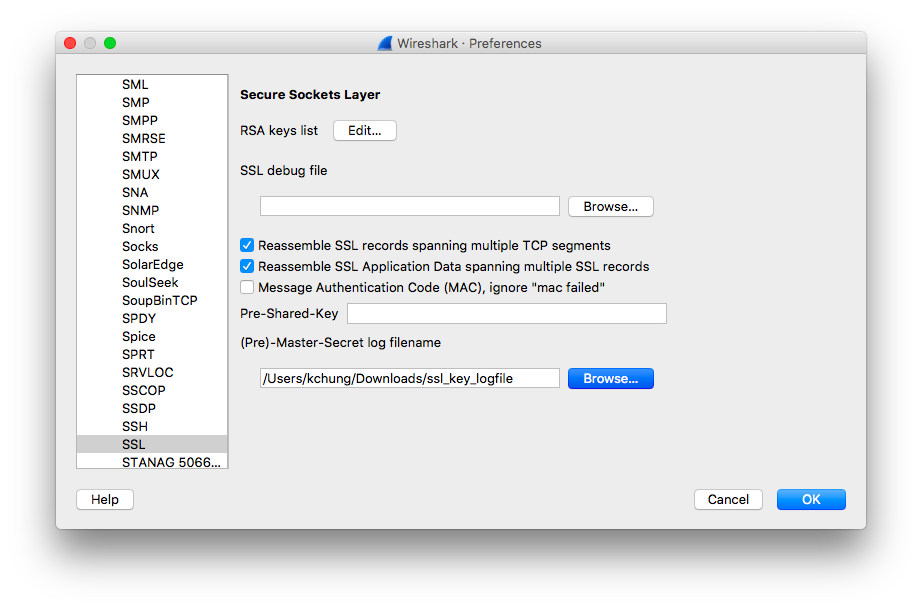
Install the ssl_key_logfile that was generated earlier into the (Pre)-Master-Secret log filename section.
- After installing the
ssl_key_logfileyou should see many more useable packets of information.

- Now that we can decrypt things appropriately we can either simply share the pcap with the
ssl_key_logfile, or we can have Wireshark export only the SSL keys that were used in this particular pcap.
This can be done by going to File > Export SSL Session Keys.
Finally after much setup, we have our "decrypted" pcap that we can provide to students, coworkers, etc. We can also use it with tshark for CLI pcap processing.
sudo tshark -r capture.pcap -o "ssl.desegment_ssl_records: TRUE" \
-o "ssl.desegment_ssl_application_data: TRUE" \
-o "ssl.keylog_file:/home/vagrant/ssl_key_logfile" \
-o "ssl.debug_file: /tmp/ssl-debug.log" \
This was very useful for me but this setup likely won't work for every situation. For example, sslsplit is missing client certificate support at the time of writing but this setup should be a vast improvement over tools that are just storing decrypted text without connection information.
In addition, this setup is something that you can simply just leave running and not have to setup again and again.
Potentially pretty useful for research setups!
Thanks to Phillip Heckel and TrustWave